GShade for The Sims 4: From Download to First Preset
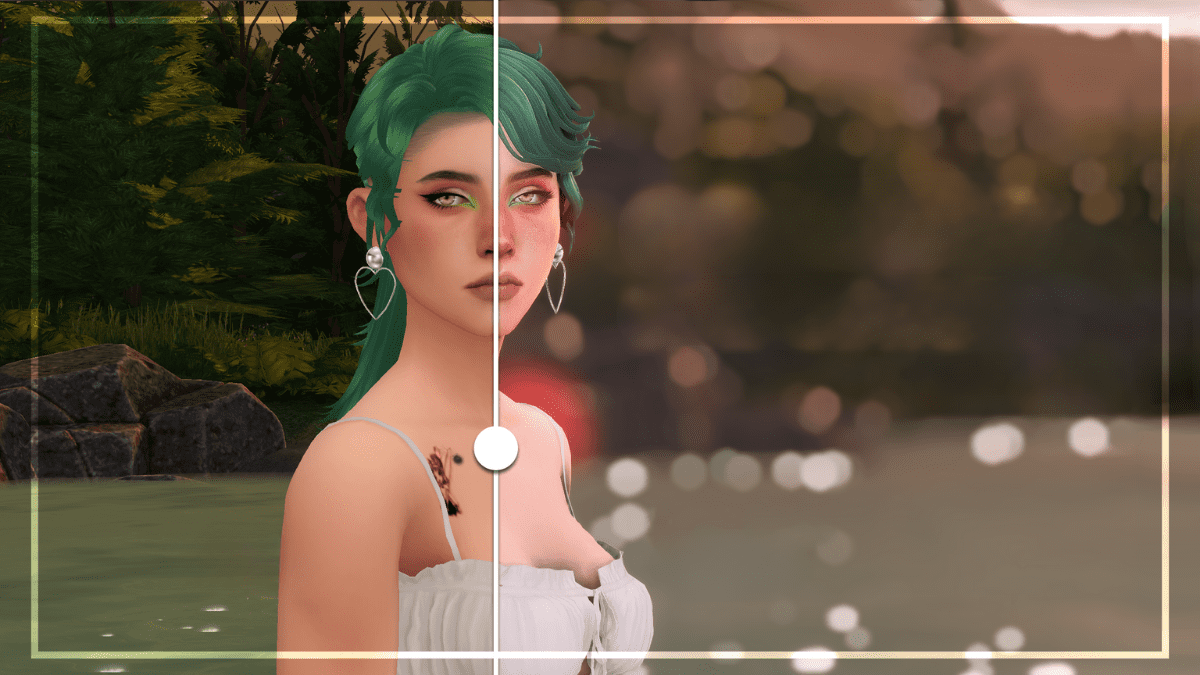
GShade is one of the most popular programs for enhancing graphics in The Sims 4. It lets you add beautiful visual effects, make colors more vibrant, and create atmospheric screenshots. In this article, we’ll break down how to properly install GShade and avoid the most common problems
GShade or ReShade?
The most well-known programs for improving in-game graphics are GShade and ReShade. Each of these tools has its own advantages.

However, it’s important to remember that newer versions of ReShade often don’t support older presets. Another big plus of GShade is that it allows you to convert your favorite presets from ReShade. That’s why, in this article, we’ll focus on how to install and set up GShade, a program that offers easy and stable preset support, even after the game or the utility itself gets updated.
Let’s get to the installation guide.
Note: This step-by-step was written on August 1, 2025 (game version 1.116).
Installing and Connecting GShade to The Sims 4
First, let’s go over how to download the program and add it to The Sims.
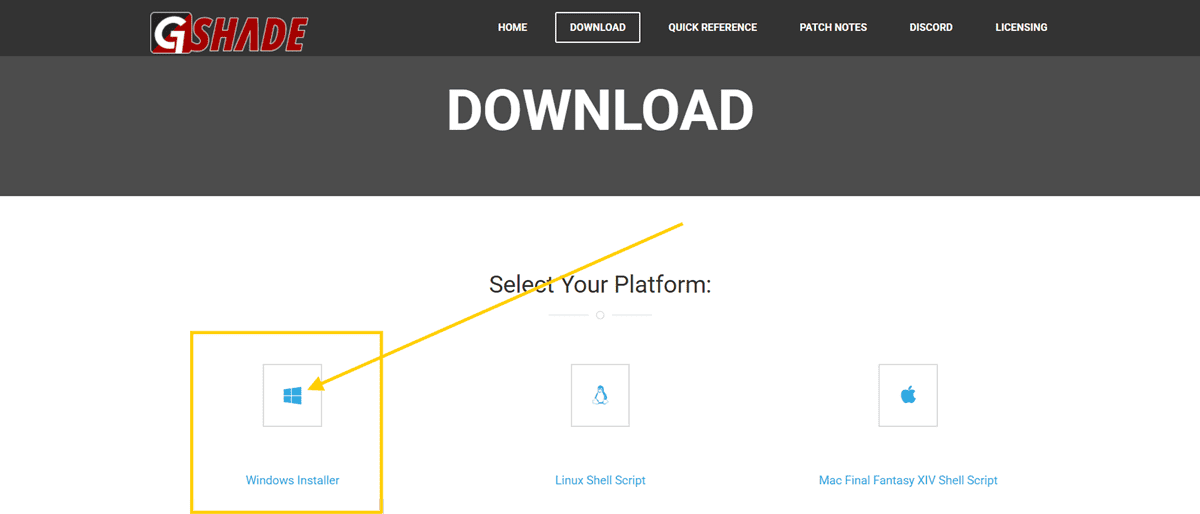
Step 1 Download GShade from the official website
The program is free and publicly available. Go to the website and select the version for your operating system. In this guide, we’ll be using Windows as an example, since it’s the most common.
Step 2 Run the installer as administrator
Choose English (or whichever language you’re most comfortable with from the list) and click Ok.

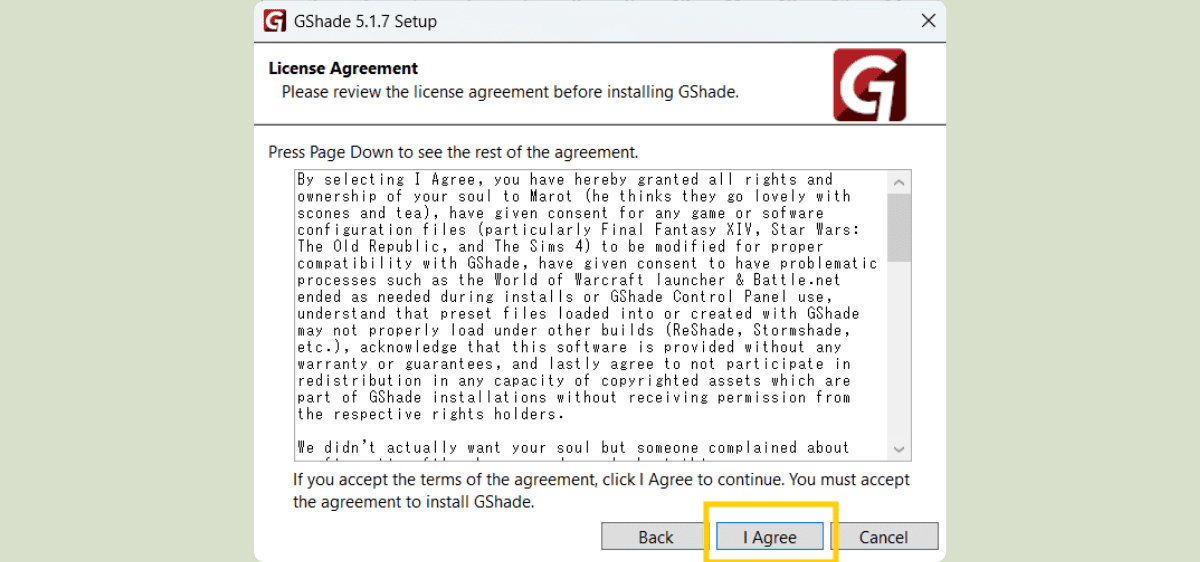
Step 3 Accept the user agreement
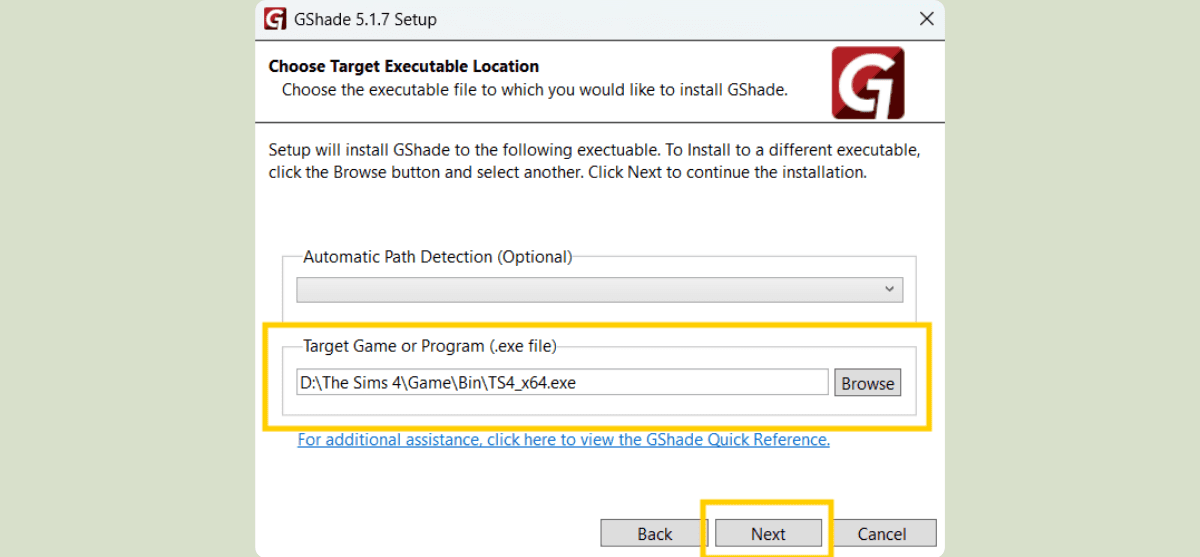
Step 4 Select the path to the game’s root folder
The GShade files need to be installed in the folder where the main .exe file of the game is located, that is, the file you use to launch The Sims 4. The Sims 4/Game/Bin folder can contain several .exe files, you want the exact one shown in the screenshot.
Step 5 Choose the correct settings before installing
1. Select your system’s bit version
For modern computers, this is almost always 64 bit.
2. Choose the DirectX version
After Sims 4 updates, the game might default to running on DirectX 11, so you need to know which version you’re actually using.
Open the game settings and go to the Graphics section.
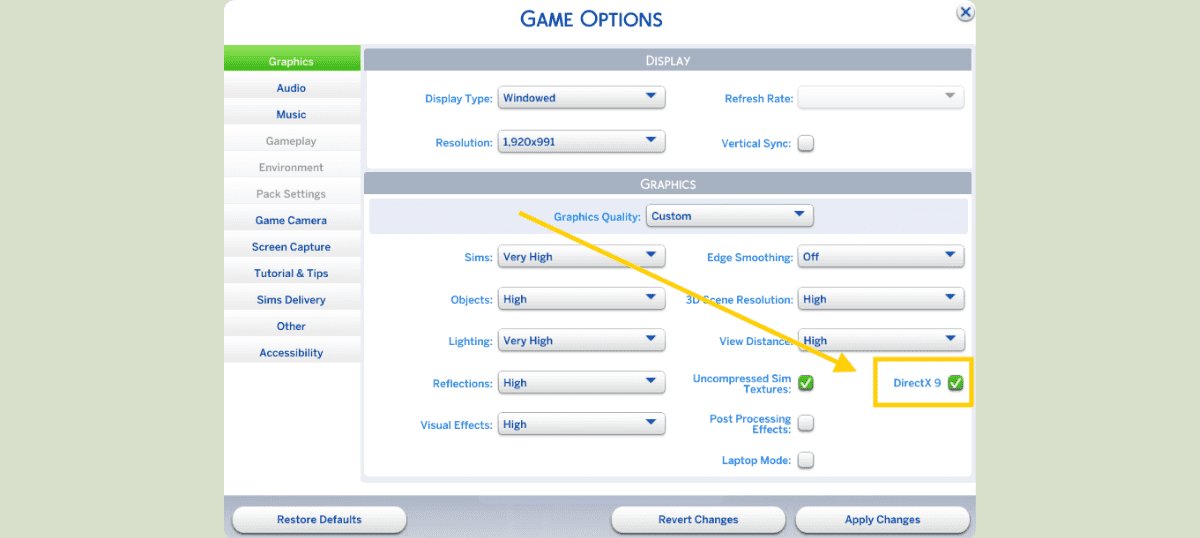
If the box next to DirectX 9 in your game settings is NOT checked, then during GShade installation, choose DirectX 11. If the box is checked, select DirectX 9.
Important! GShade also offers DXVK in the list. This is an experimental format that automatically adjusts to your game. However, we don’t recommend picking it: it can cause lags and crashes, and weaker PCs most likely won’t handle it at all. It’s better to specifically select either DirectX 9 or DirectX 11 and tick the corresponding box in the GShade settings.
For GShade to work properly, the game and the filter have to match in the DirectX version.
If you chose DirectX 9 during GShade installation, you now need to launch the game ONLY using the special DirectX 9 shortcut. You’ll find it in The Sims 4/Game/Bin.

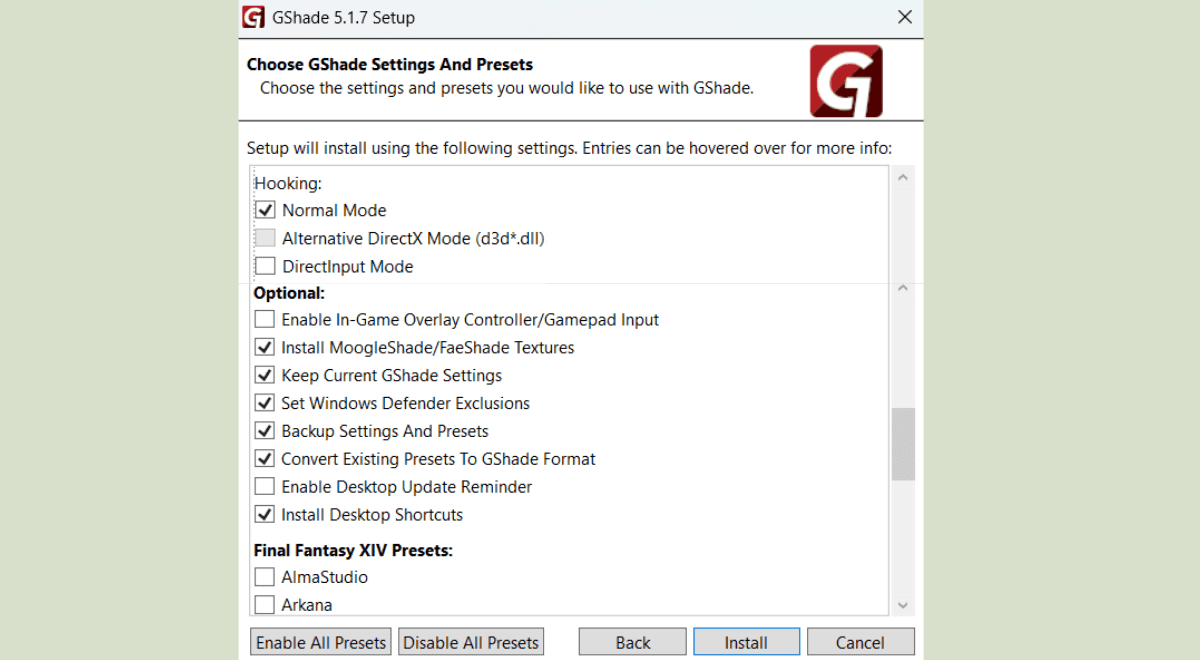
3. Set the rest of the checkboxes as shown in the picture, and click the "Install" button.
Step 6 Choose the folder for saving screenshots
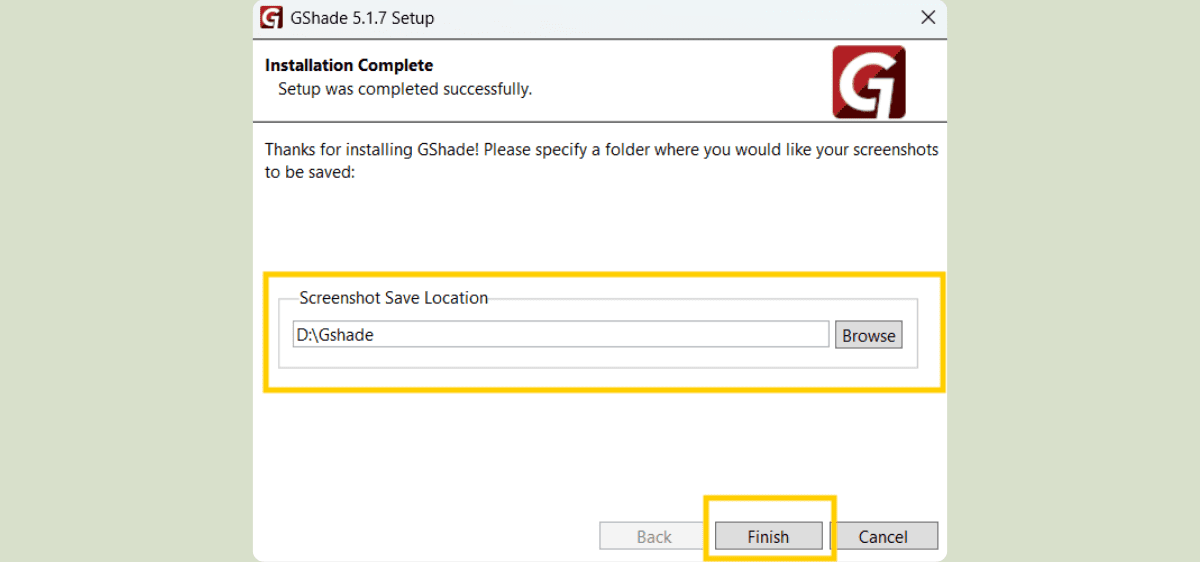
Next, the program will offer you a quick guide, just click "No".
Adding presets
Step 1 Download the presets
Most likely, before installing GShade, you’ve picked out a few beautiful presets. Now’s the perfect time to use them!
If you don’t have any saved yet, you can find them from your favorite creators or bloggers, on Patreon, Pinterest, Boosty, by doing a quick Google search, or by checking out our collections of presets: with moody tones and with all kinds of different styles.
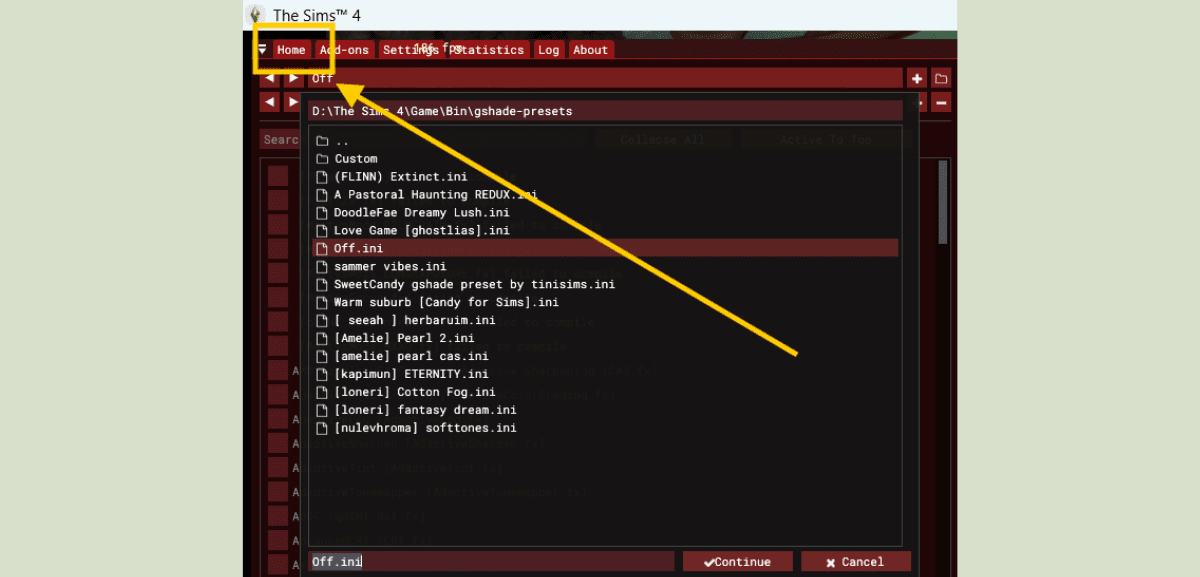
Step 2 Add the presets to the GShade folder
After installation, two folders were created in your game’s root directory: gshade-addons and gshade-presets. Move your presets into the Custom subfolder inside the gshade-presets folder. The path should look like this:
The Sims 4 — Game — Bin — gshade-presets — Custom
There’s already a file called Off in there, which makes the game run without any presets. Don’t delete it – just add your new presets alongside it. The Custom folder will look something like this:

Initial setup of GShade
Step 1 Launch the game
When you start the game, you should see some text at the top of the window. If you see it, that means everything was installed correctly.
Step 2 Open the GShade menu in-game
As we learned from the screenshot, the program opens with the Shift+Backspace key combo. When you press it, the GShade window will pop up on the left.
In the window, you’ll see the program loading. Depending on your computer, this can take up to a few minutes. Wait until it finishes and you see the offer for a tutorial.
Step 3 Skip the tutorial

Step 4 Basic settings
In the top menu, select the Settings section. This takes you to the GShade settings.
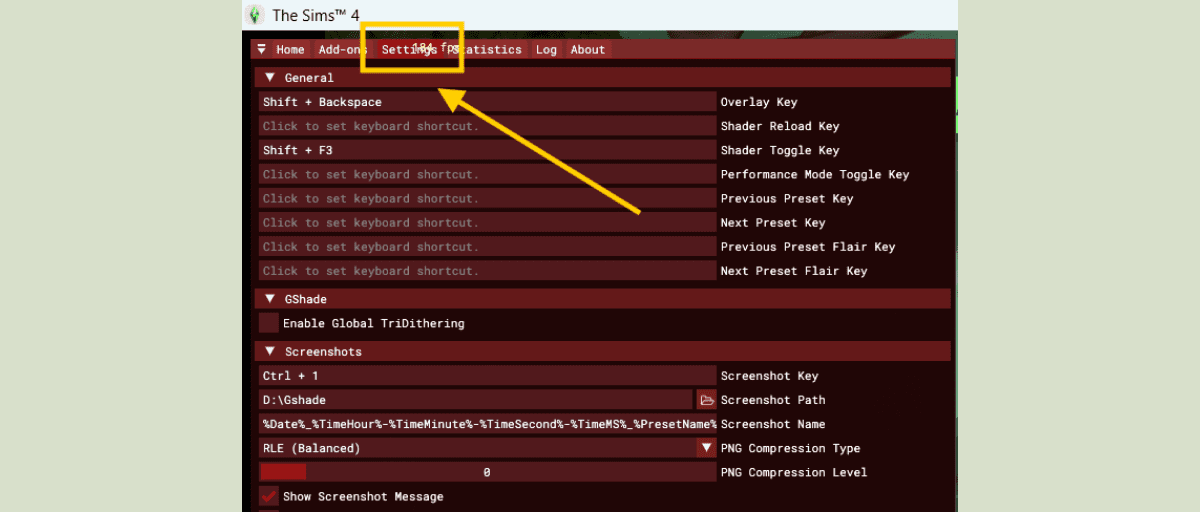
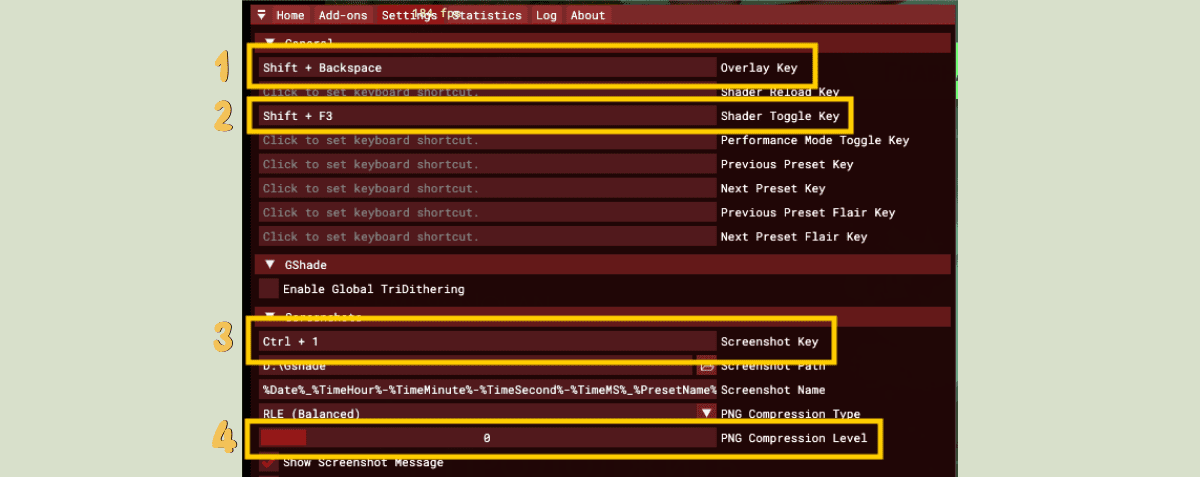
At the start, we only care about a few things:
1. Overlay Key – the key combo that brings up the GShade window.
2. Shader Toggle Key – the combination that turns the selected preset on and off.
3. Screenshot Key – the combo you’ll use to take screenshots.
You can set all three of these to whatever you like. Just clear out the field and press the keys (or key) you want to use.
4. PNG Compression Level – adjusts the compression level for your screenshots: this setting controls the quality of your screenshots; we recommend setting it as low as possible (0 or 1) for best quality.
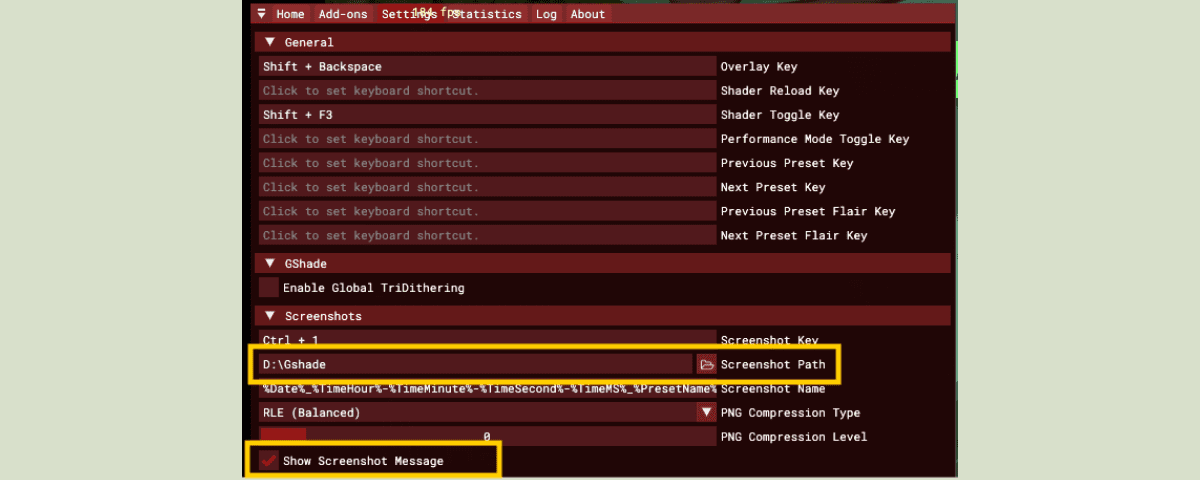
You can also check in the settings which folder your screenshots are being saved to, and turn the screenshot notification on or off, and so on. The rest of the options aren’t that important for now.
Using presets during gameplay
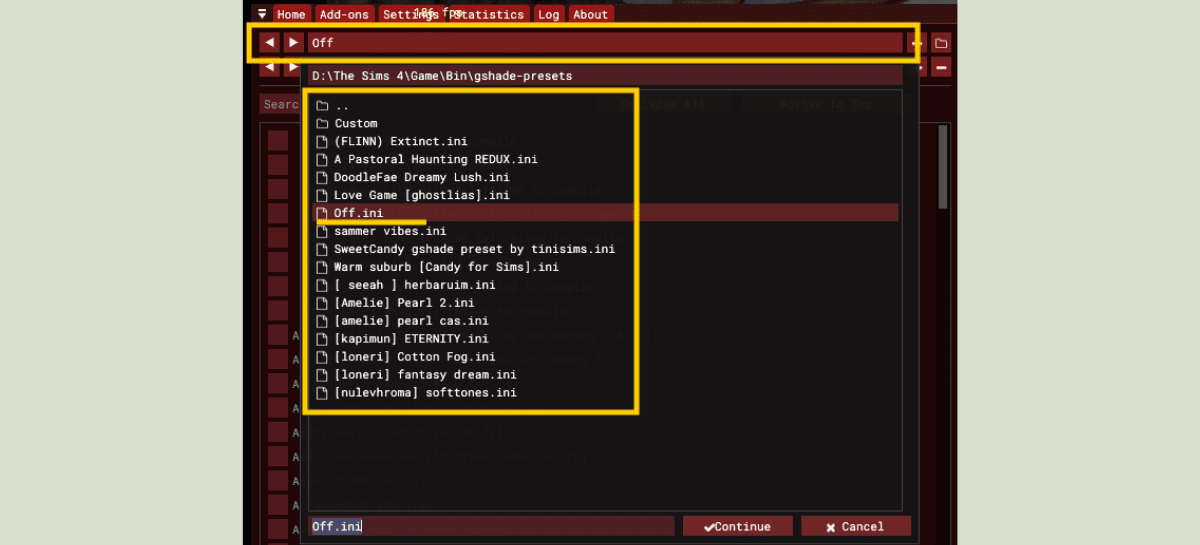
Step 1 Go to the Home tab
Here you can manage all the presets you’ve added.
Step 2 Select the preset you want
Click the top field to see the full list of available presets and choose the one you want.
To switch between presets, you can also open the full list or cycle through them one by one by clicking the arrows to the left of the top field.
To return the game to its original look, select Off.ini from the list.
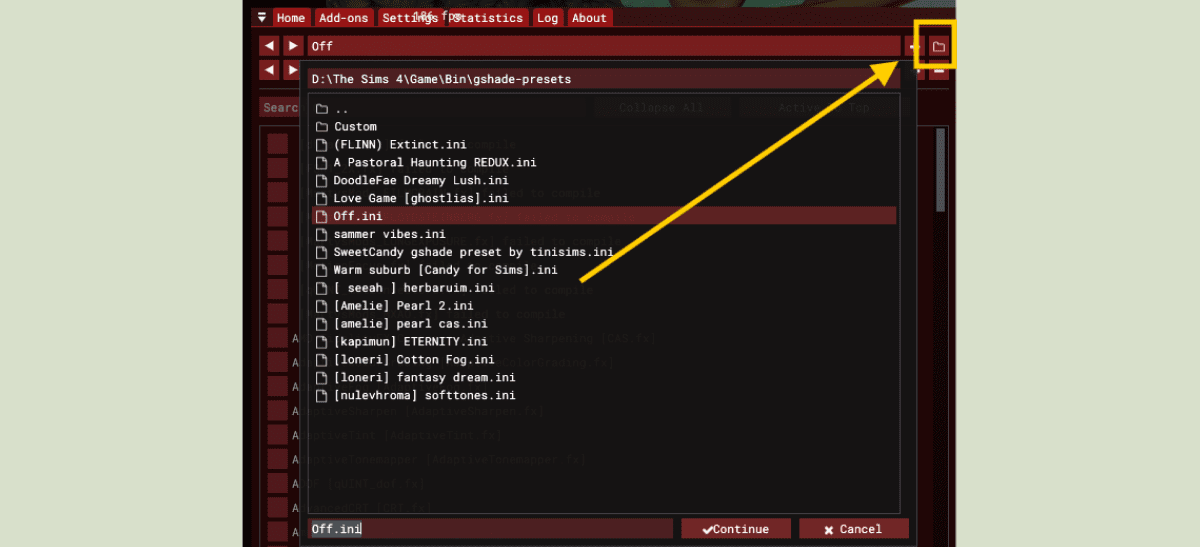
You can add or delete presets on the fly without leaving the game. To do this, open the GShade window and, in the Home tab, click the folder icon in the upper right corner. The folder with all your presets will open up right away, where you can add, move, or delete them as needed.
How to uninstall GShade
1. Open the GShade Control Panel.

2. Go to the Tools tab.
3. Find the “Uninstaller” button, click it, and confirm the removal.
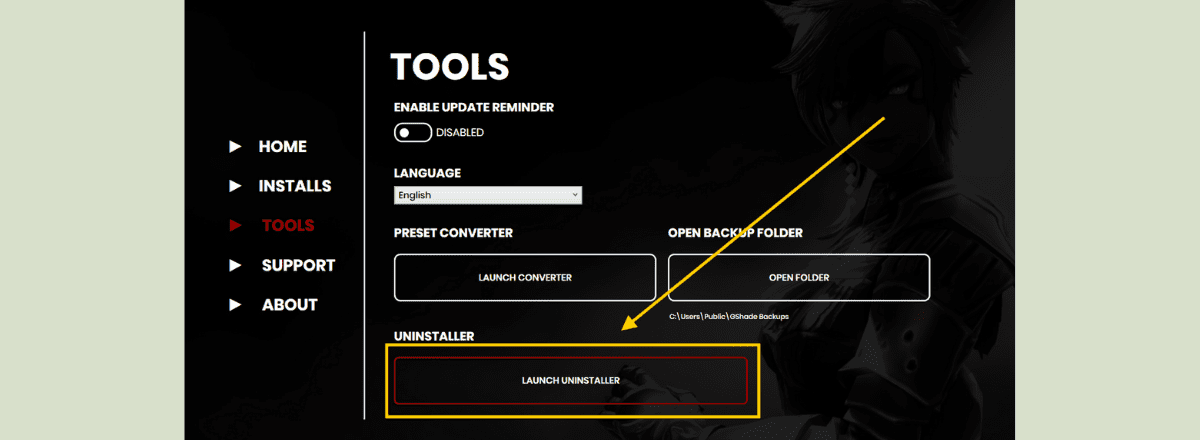
That’s it, the program is gone!
If you want to learn more about working with GShade, check out different shaders, create your own presets, or just take your visuals to the next level, we recommend reading the ultimate GShade guide by Buggy Starship.