Graphics FAQ for The Sims by buggy starship
Here’s a breakdown of the settings I use in-game and with Gshade. All the following assumes you’re using Gshade/Reshade.
My screenshots are in 2560x1440 resolution, on an LG Ultragear monitor.
Full specs of my PC:
- Processor: AMD Ryzen 9 5950X 16-Core Processor 3.39 GHz
- RAM: 2x32GB 3800 CL17
- GPU: AMD Radeon RX6700 XT
- Motherboard: Prime x570-pro
- M.2 SSD: Kingstone KC3000 2TB
- PSU: Cooler Master MWE 1050
- Cooling: Thermalright Macho Rev. B

Game and Gshade Settings
1. Disable SSAO in-game.
That’s pretty much all there is to say. Turn off those ugly in-game shadows. Have you ever dealt with weird rendering issues? Like when you hang a kitchen cabinet, and it looks a different color from the rest? Disabling SSAO gets rid of this eyesore from EA for a cleaner picture.
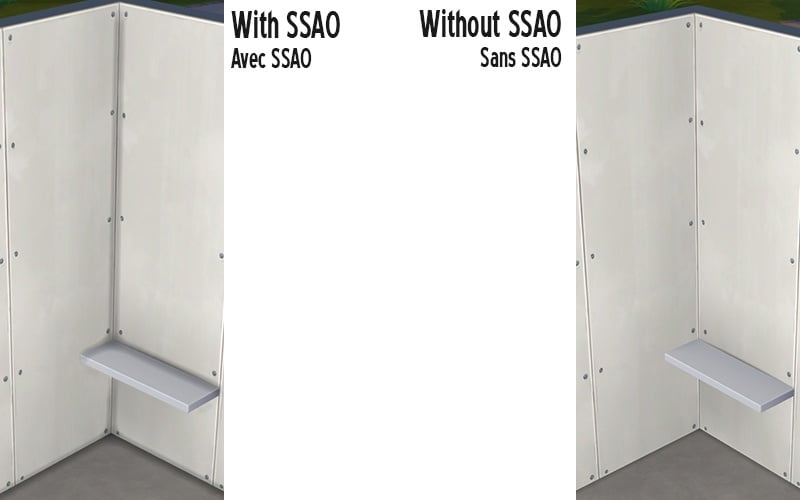
*source: Around the Sims 4*
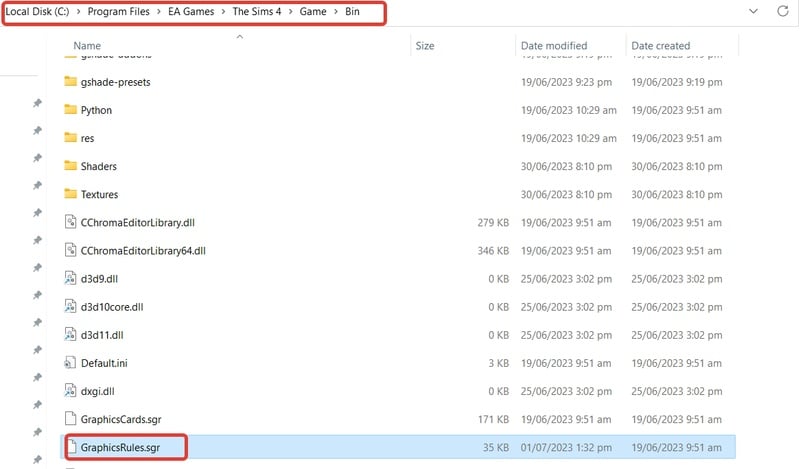
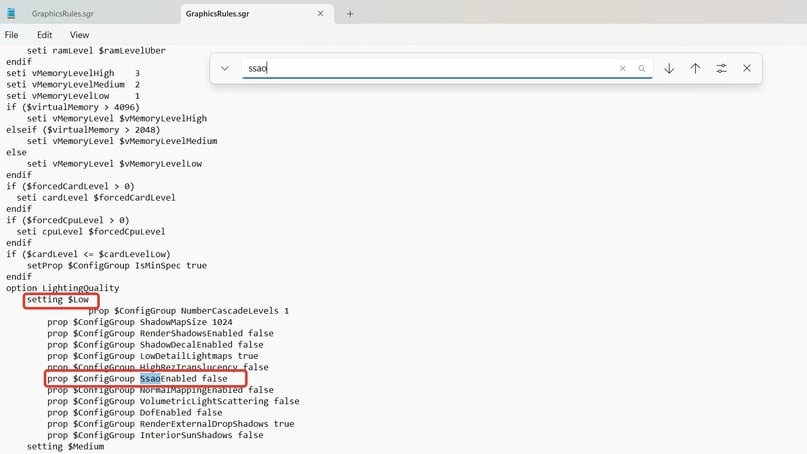
Go to the root folder of the game (disk/EA Games/The Sims 4/Game/Bin). Find the GraphicsRules file and open it with "Notepad." Press CTRL+F and type in "ssao" in the search. The first entries will be the graphics settings labeled as "low" in the game menu. Here, ssao is already disabled (it’s set to "false"). We need to do this for all settings (medium, high, very high), changing "true" to "false." Save the file. Done. A carousel at the bottom for clarity.
Thus, we will eliminate the dirt from game shadows and be able to operate with a clean MXAO shader.
UPD: In the game settings the resolution of 3D scenes should be high.
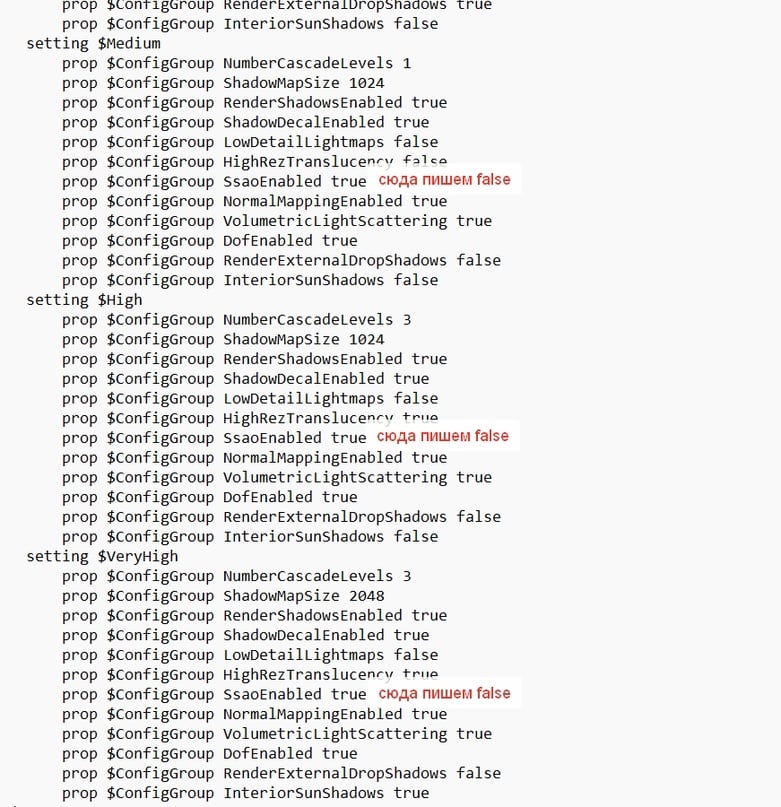
When updating the game via EA App, Steam, and so on, the file will be restored, so don’t forget to set the values again after updates. The same applies to lighting mods that are placed not in the Mods folder but in Data and Delta.
UPD: In March 2024 I wrote a comprehensive guide on Gshade that includes ALL the information about creating a preset. You can find detailed explanations about how it all works; this article contains basic information.
2. Disable in-game anti-aliasing in the game settings. Shader settings for SMAA.
We get a “stunning” image with jagged edges. To compensate for this, we need the SMAA shader (there's also FXAA, but I don’t recommend it as it blurs the image more). Let’s enable the shader.
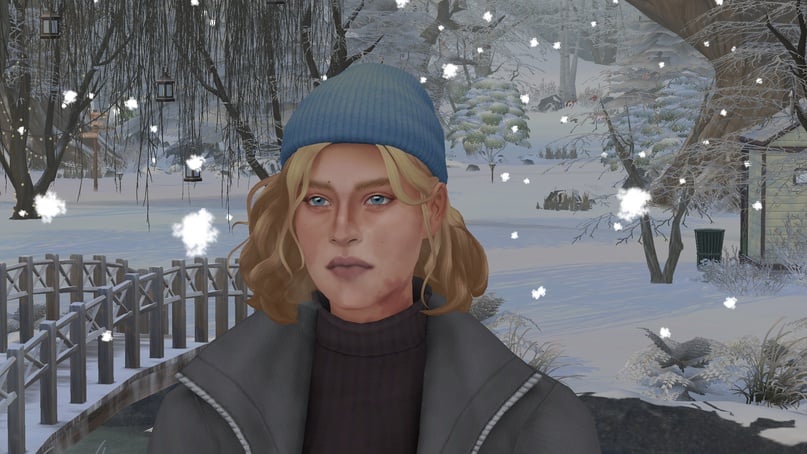
*SMAA off*
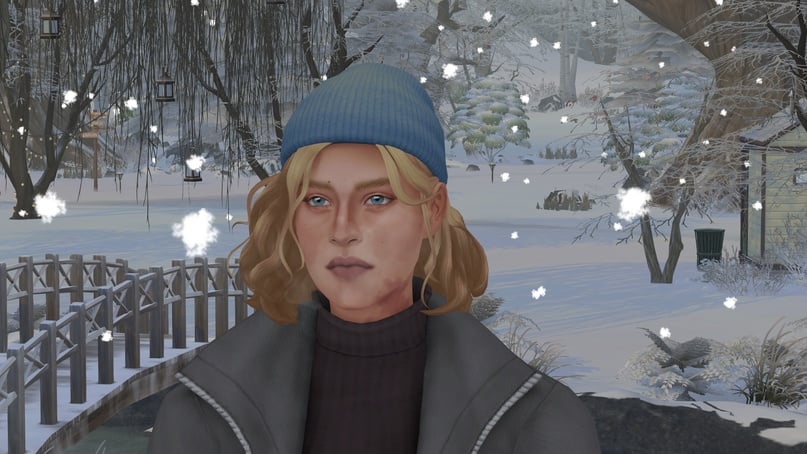
*SMAA on*
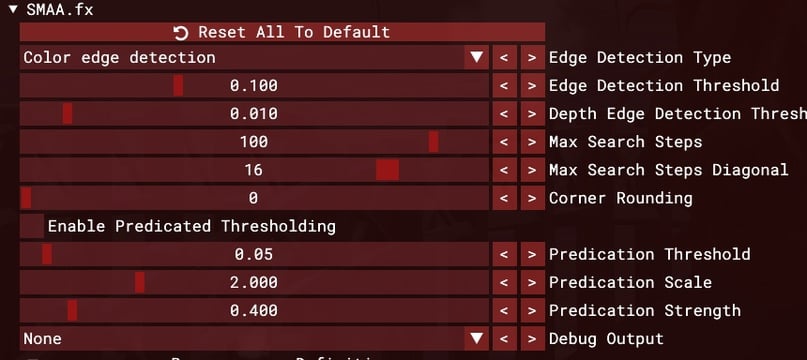
*my SMAA settings*
3. Sharpness.
Everything is great, but The Sims looks like a blurry mess. Let’s enable sharpness. Of everything I’ve tried over the years, the DELC_sharpen shader handles the basic task the best.
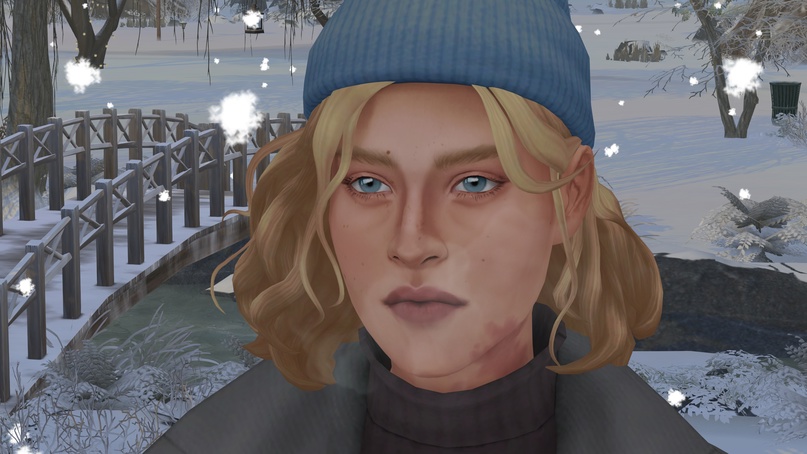
*with anti-aliasing and without sharpness*
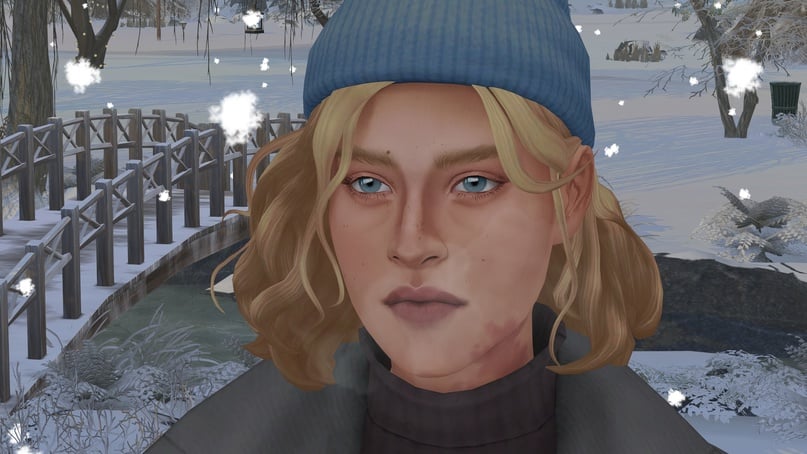
*with anti-aliasing and with sharpness*
My standard value is around this number, but depending on the preset and the shaders used, I adjust the slider.

4. Shadows. MXAO and SSDO.
A cornerstone: some people like it, some don’t. I like it, and I use it: some shadows are harsher, some are softer. In the current version of Gshade, there are three MXAO shaders, and I use all of them because they render shadows differently.
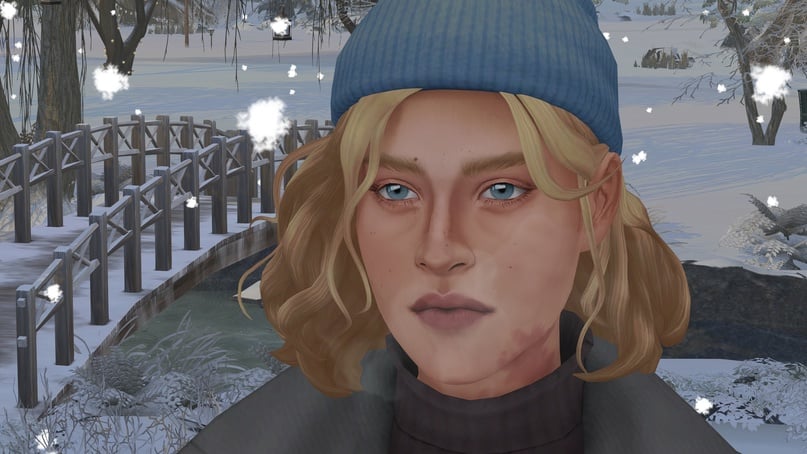
*without MXAO*
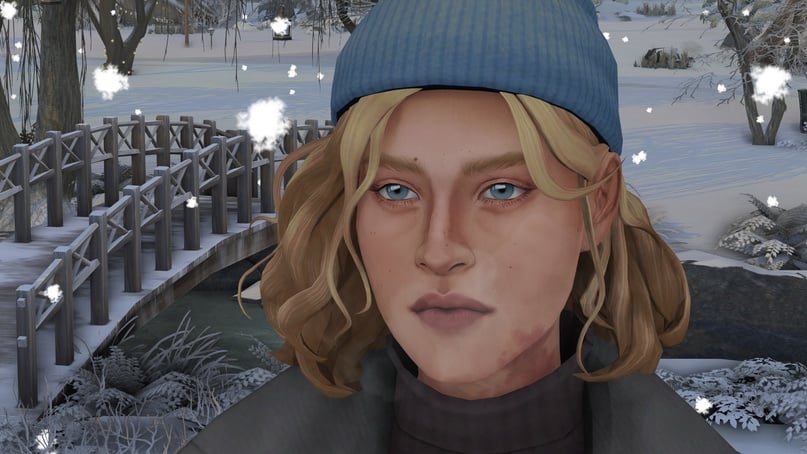
*with MXAO*
My standard "soft settings".
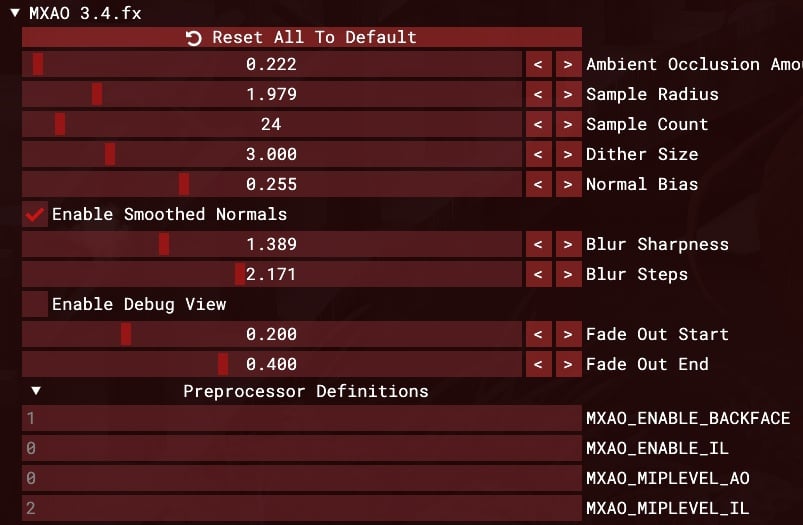
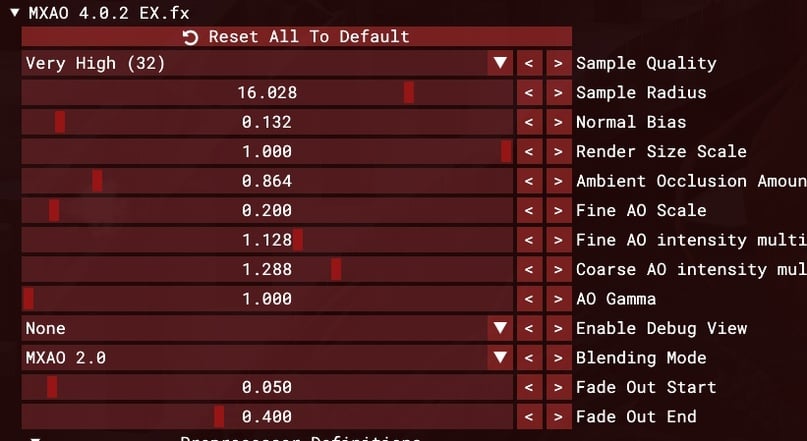
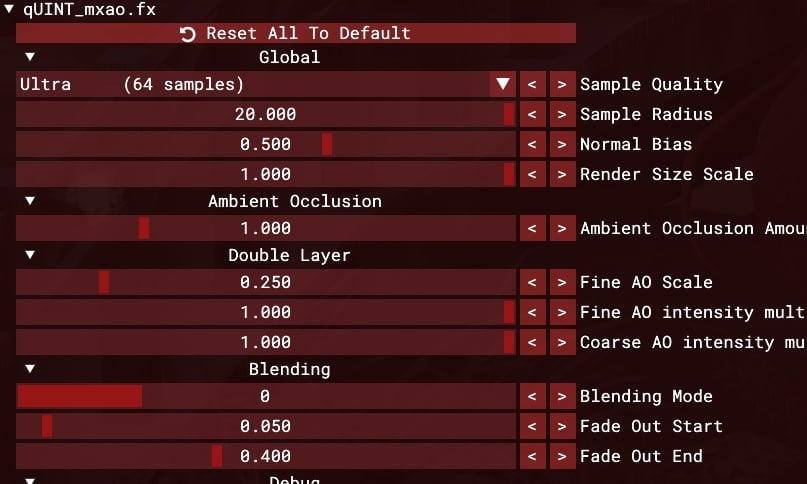
If you don’t want to deal with all three and need to choose only one, then it’s definitely quint_mxao.
In addition to these shadows, there is another shader, SSDO. I want to mention that it puts a load on the hardware, so I only enable it for screenshots. SSDO creates additional volume where MXAO does not.
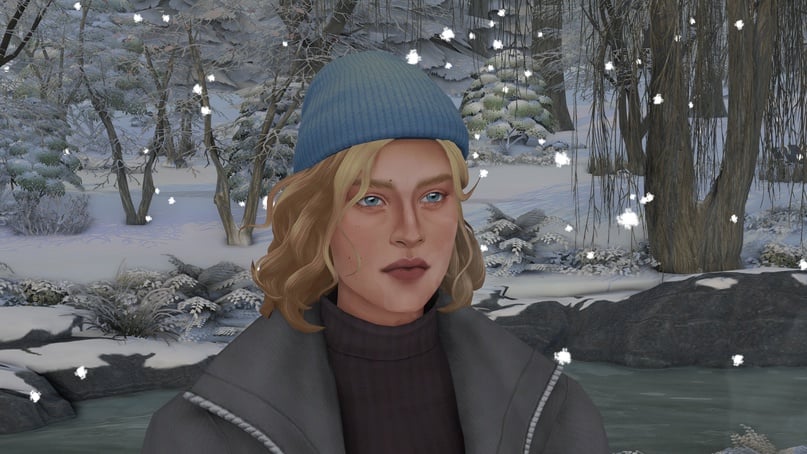
*with MXAO and without SSDO*
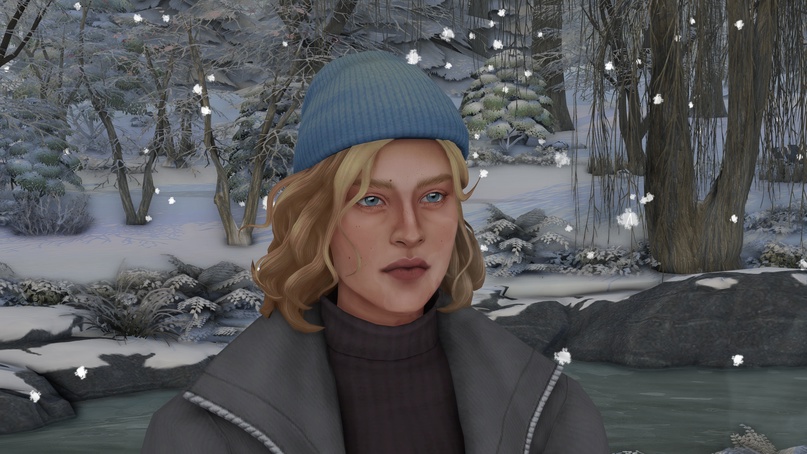
*with MXAO and SSDO*
This shader is quite finicky, and sometimes you need to adjust it depending on how close-up you are, but for portraits that are roughly “chest up,” my settings are:
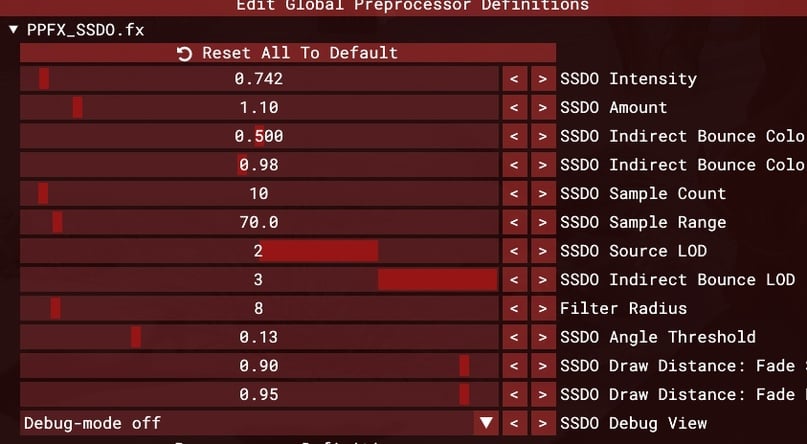
This is my core set of shaders that I transfer to different presets and adjust as needed.
Let’s move on to editing in Photoshop.
PHOTOSHOP
Typically, I don’t edit (only crop) game screenshots; my creative imagination and “talents” are usually spent on my setups.
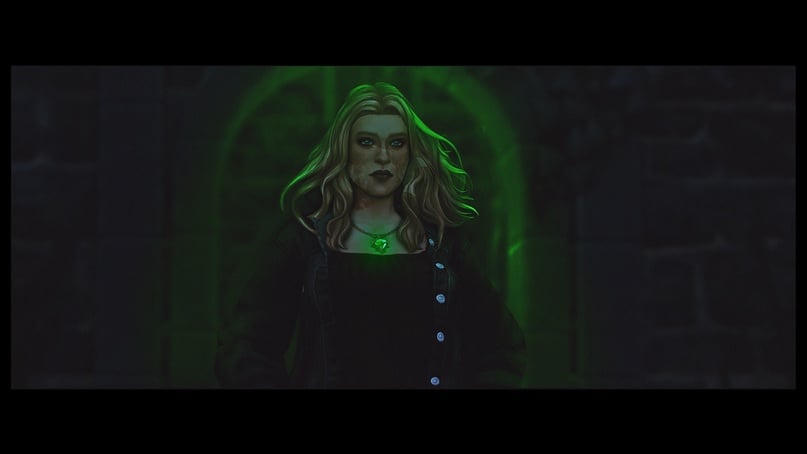
*draw hair and light*
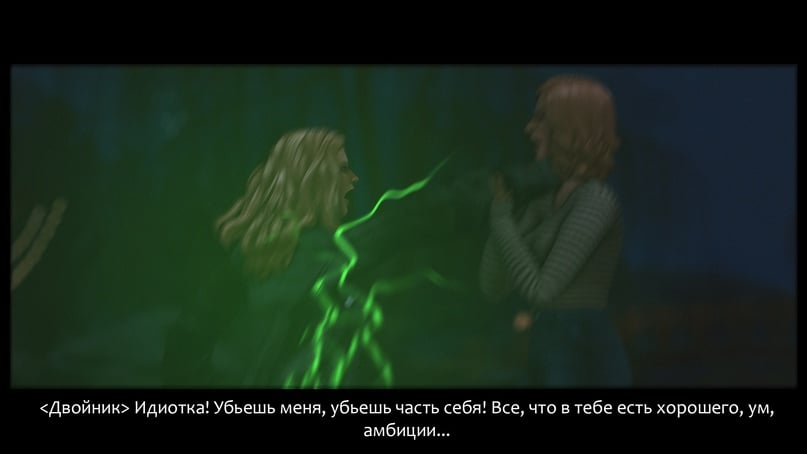
*hair, effect, light, blur*
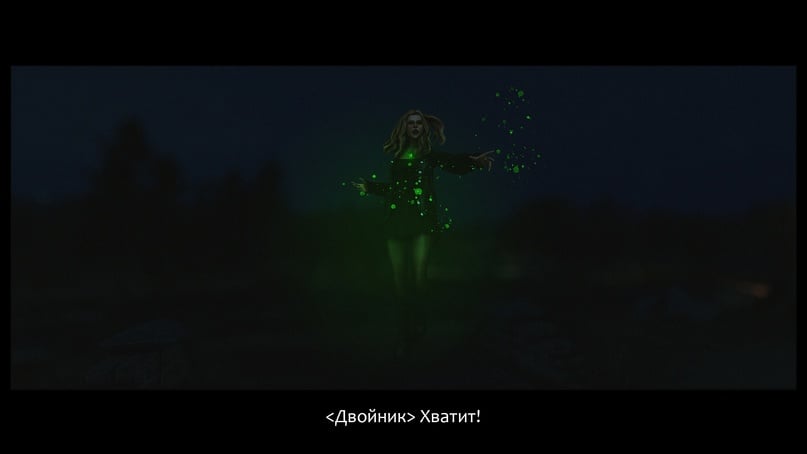
*hair, light, effect*
As for more “routine” editing, I sometimes adjust exposure and curves in Photoshop. Sometimes I want more or less brightness, exposure, or saturation.
For this, there are actions. I don’t edit each screenshot manually; I use my own ready-made “presets” for processing in Photoshop.
To install my actions, you just need to double-click on them with the mouse, and they will automatically load into Photoshop.
We open our screenshot in Photoshop, take a look at it, and think about what we want to achieve (it’s already good, but we can give it a certain mood).
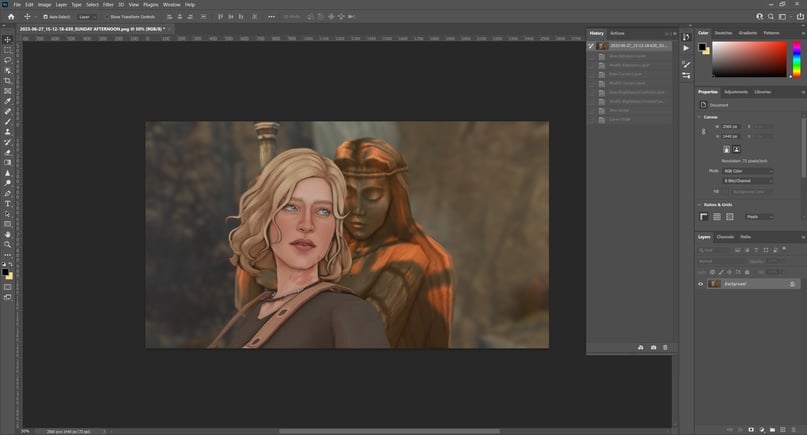
To make the Actions panel appear, you need to click on Window in the top menu and select Actions. It will appear next to the History panel.
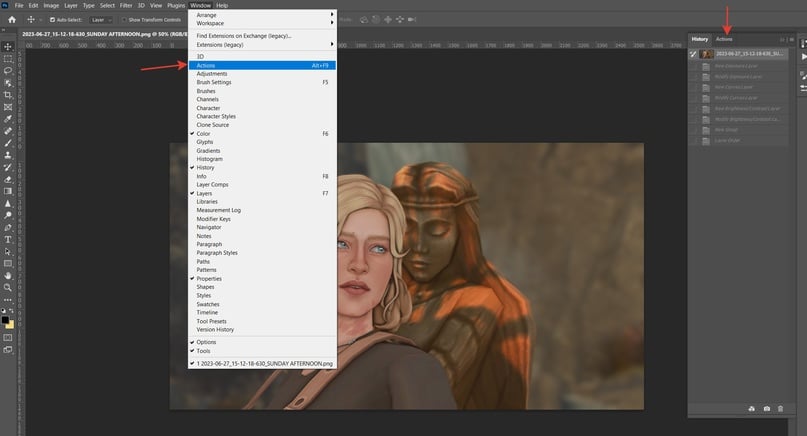
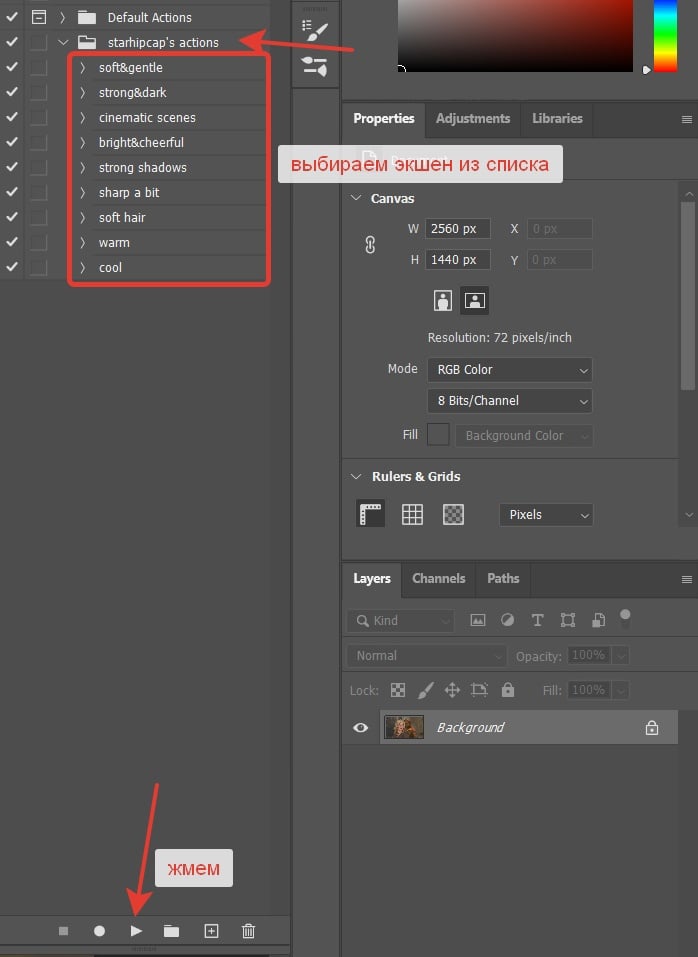
Select the action and click on it. Try different ones to understand what effect each has and which effect suits your screenshot (note: the soft hair action applies an oil paint effect to the canvas, blurring the screenshot; I sometimes use it for softer hair in screenshots, erasing the face and surroundings with an eraser, leaving only the hair in the filter).
I choose the very first one, soft and gentle, click the button, and the following happens:
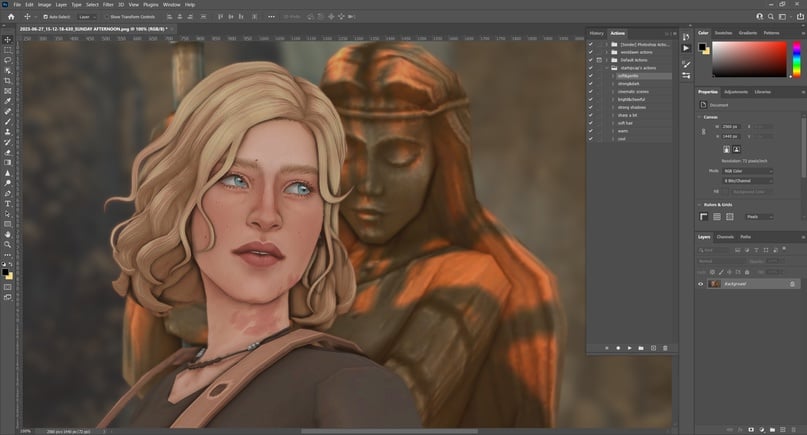
*original*
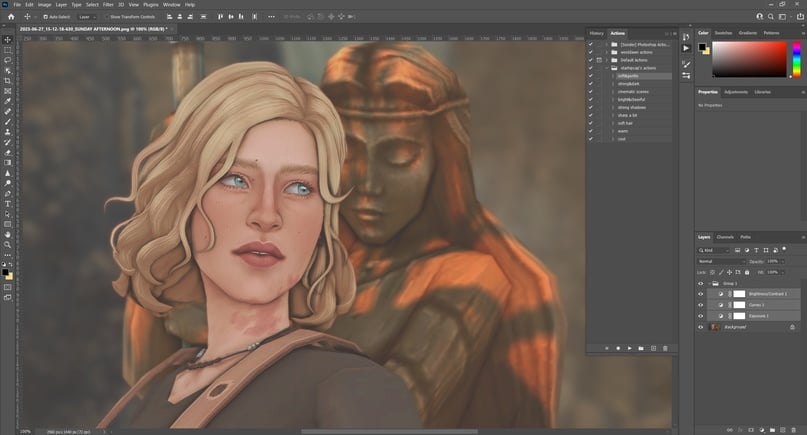
*after the action*
Another example:
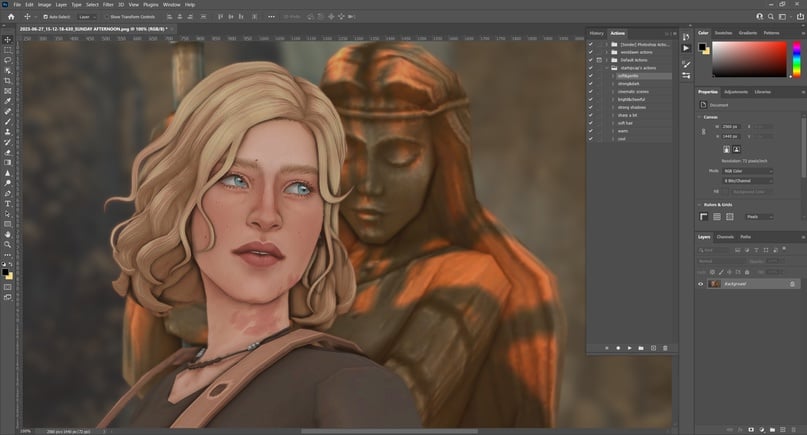
*original*
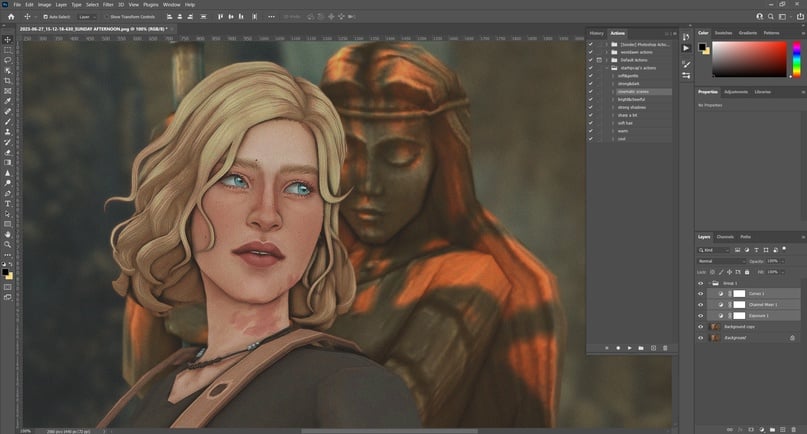
*after the action (there's a lot of noise because I usually use the action with a different preset where there’s no noise in the game)*
Boom, and the screenshot has magically been processed.
After that, we need to merge the layers and save. Done!
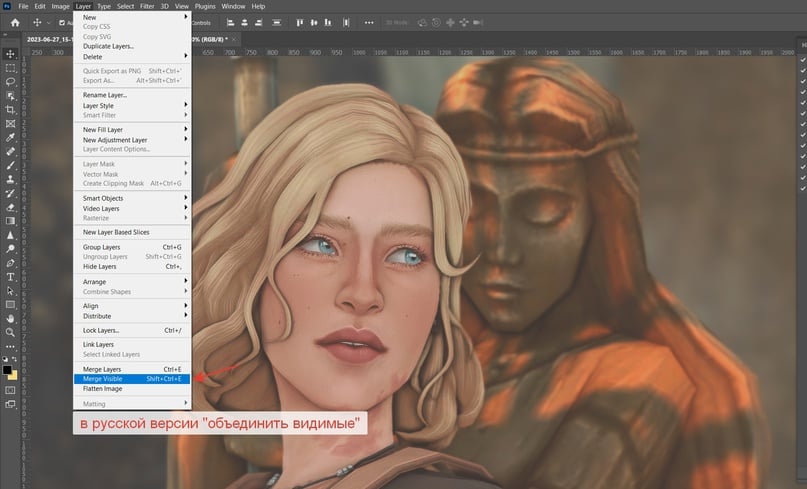
OTHER
I use the enhanced game lighting from NorthernSiberiaWinds, an amazing mod. I have the light version AVERAGE BASE LIGHT ROOMS installed, as I don’t like having overhead lights in houses, but I want to see the characters somehow. It allows for placing several wall sconces/table lamps for additional “colored” lighting, creating a beautiful, clean picture.
I also have the sunblind mod, which replaces the lighting in the world (sunsets, sunrises, etc.). It goes into the root folder!
UPD: Sometimes I switch to milk thistle from the same author.
That’s all❤️
This concludes the complete breakdown of graphics!
buggy starship:
