Ultimate Sims 4 Graphics Improvement Tutorial: Configs, Mods & Tweaks
Not all players are satisfied with the default graphics in The Sims 4. Common problems include low-quality shadows, poor lighting, and a generally blurry appearance that affects immersion and gameplay experience. If you want to enhance The Sims 4 graphics, fix lighting issues, and achieve stunning visuals, this Sims 4 graphics optimization guide will help you get the best visual results and more enjoyment from your game.
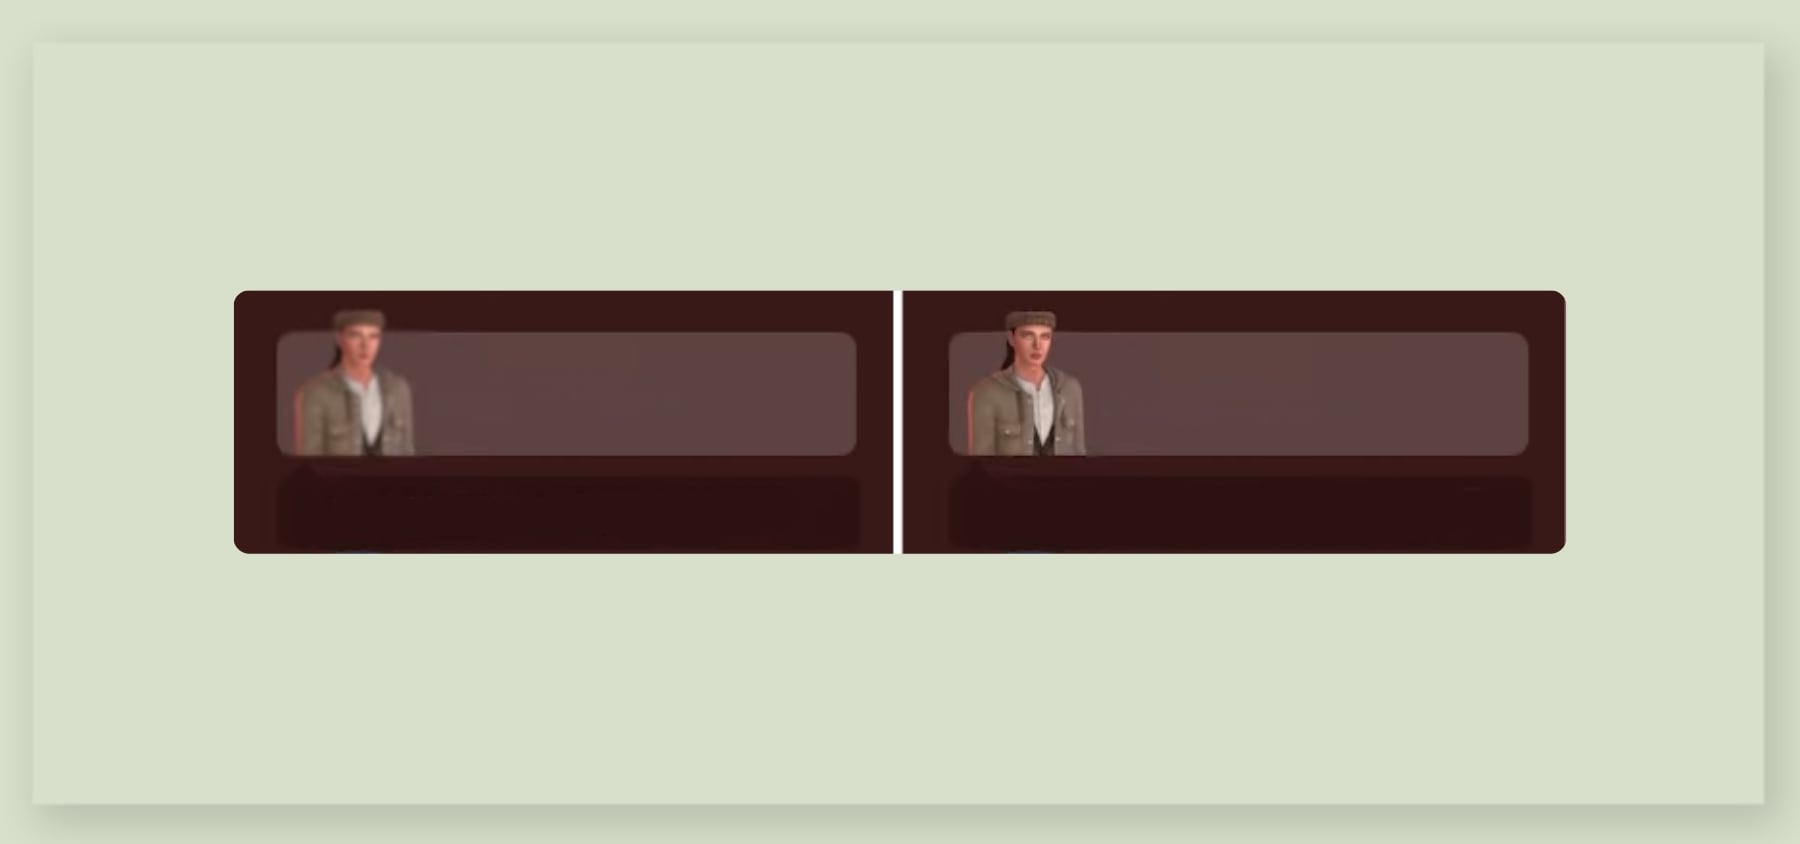
1. Fixing Blurry Avatar in The Sims 4 Menu
Many players notice a blurry avatar in the main menu, which takes away from the polished look. To fix this Sims 4 blurry avatar issue and improve sharpness locate the ThumbnailConfig file in your game’s root folder:
C: — (your platform where you purchase the game) — The Sims 4 — Game — Bin — res
Note: this is not the Documents folder where save files are stored.
Open the file and use the search function (CTRL + F) to find the simbust parameter.
Change the value to:
Size_Small = 256,256
Save the file to apply better avatar clarity.
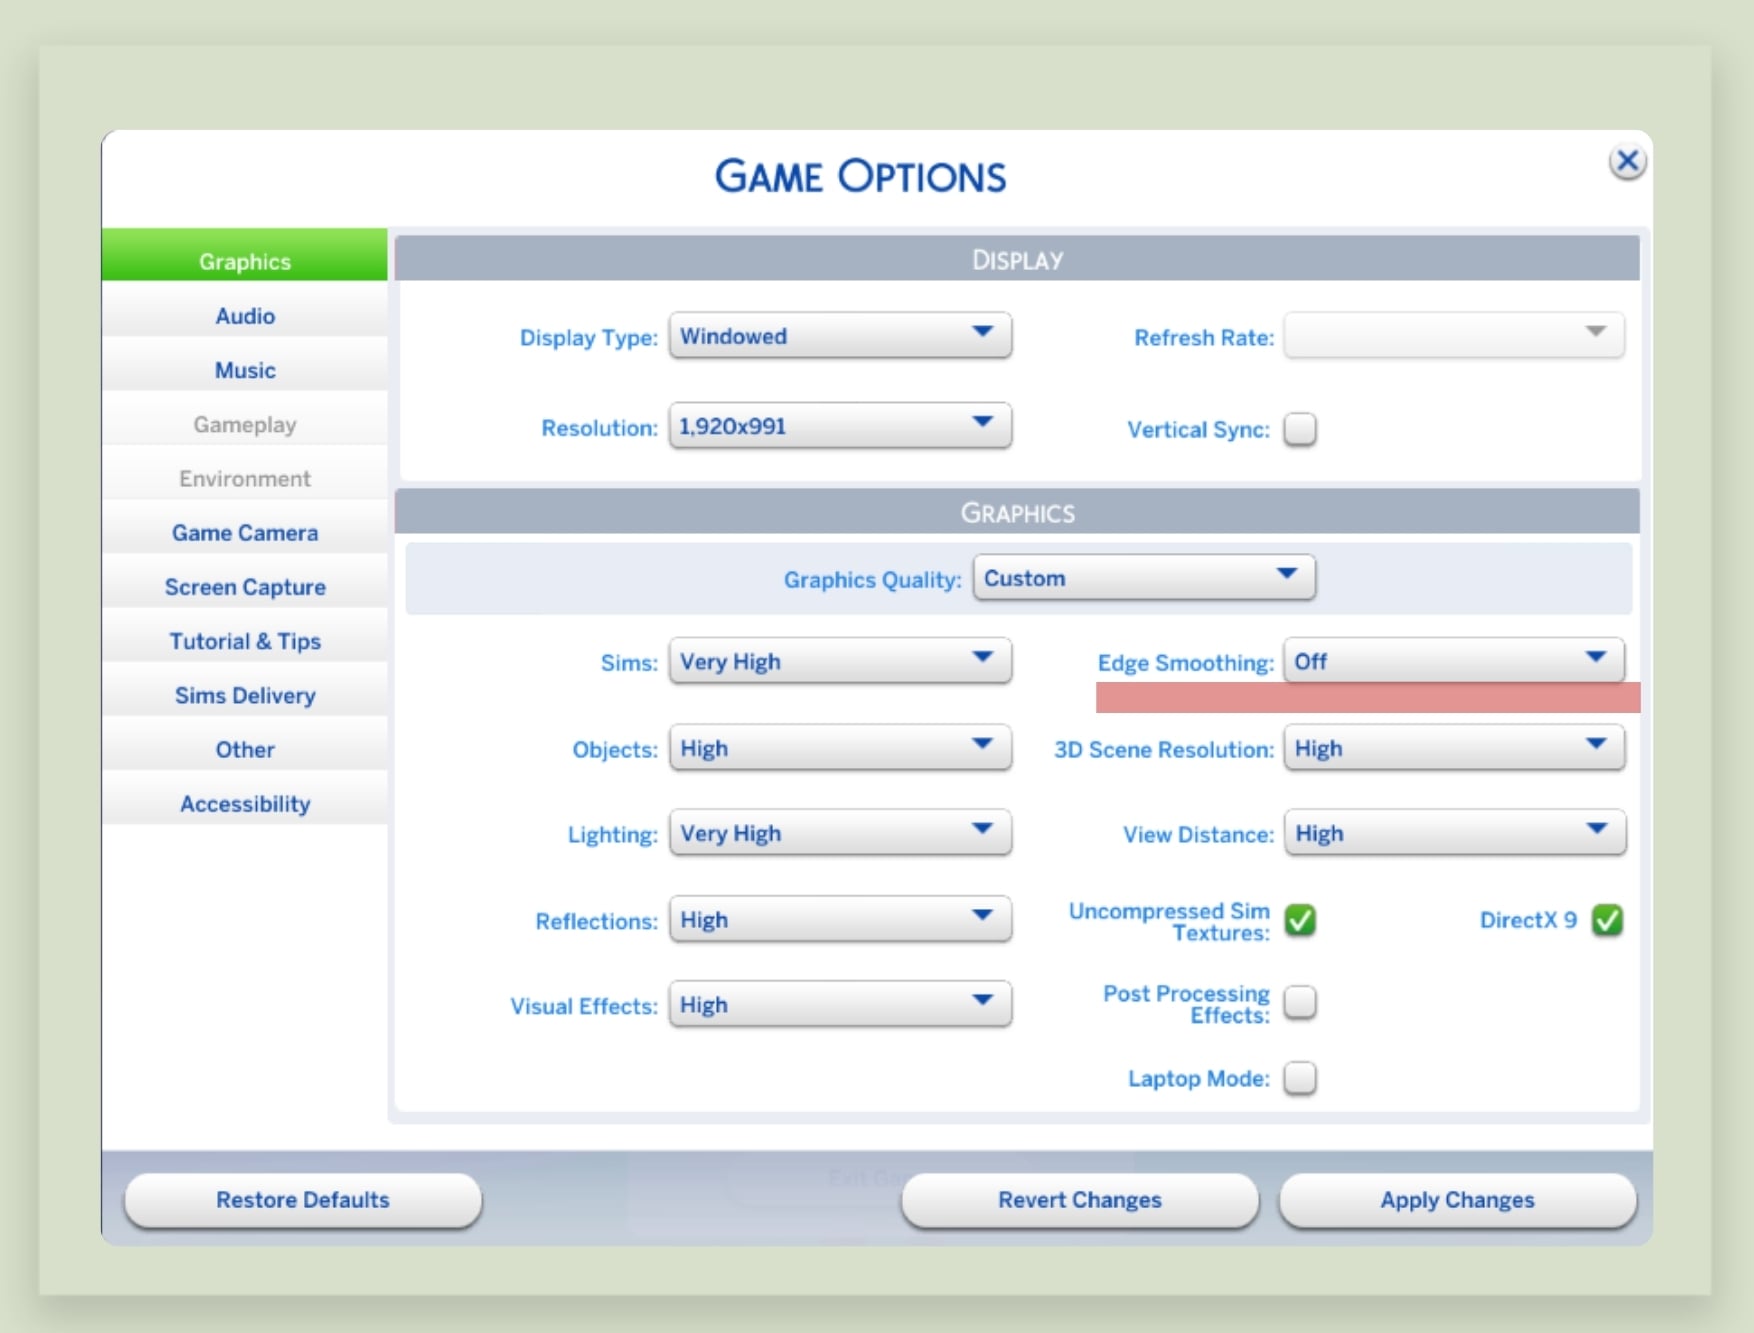
2. Advanced Sims 4 Graphics Configuration Files
To push your visuals further on high-performance PCs, use advanced graphics settings for The Sims 4:
In your Documents, go to Documents — Electronic Arts — The Sims 4.
If it doesn’t exist, create a new folder called ConfigOverride.

Download a custom graphics configuration file from Simp4Sims’s Patreon, which offers enhanced visual quality, realistic shadows, and better lighting effects. Watch the creator’s YouTube video for configuration details and installation instructions.
For the best Sims 4 shadow settings, try the “Alt Clipping” version (especially effective with the “SHADOWS FOR DAYS” preset), but choose the version that matches your preference. Ignore extra shadow tweaks if unnecessary.
Extract the downloaded archive and place the configuration file into your ConfigOverride folder.
If your GShade or ReShade effects (blur or shadows) are missing after installing these settings, try turning off anti-aliasing in the standard Sims 4 graphics settings.
3. “Shadows for Days” – Perfect Shadows and Lighting
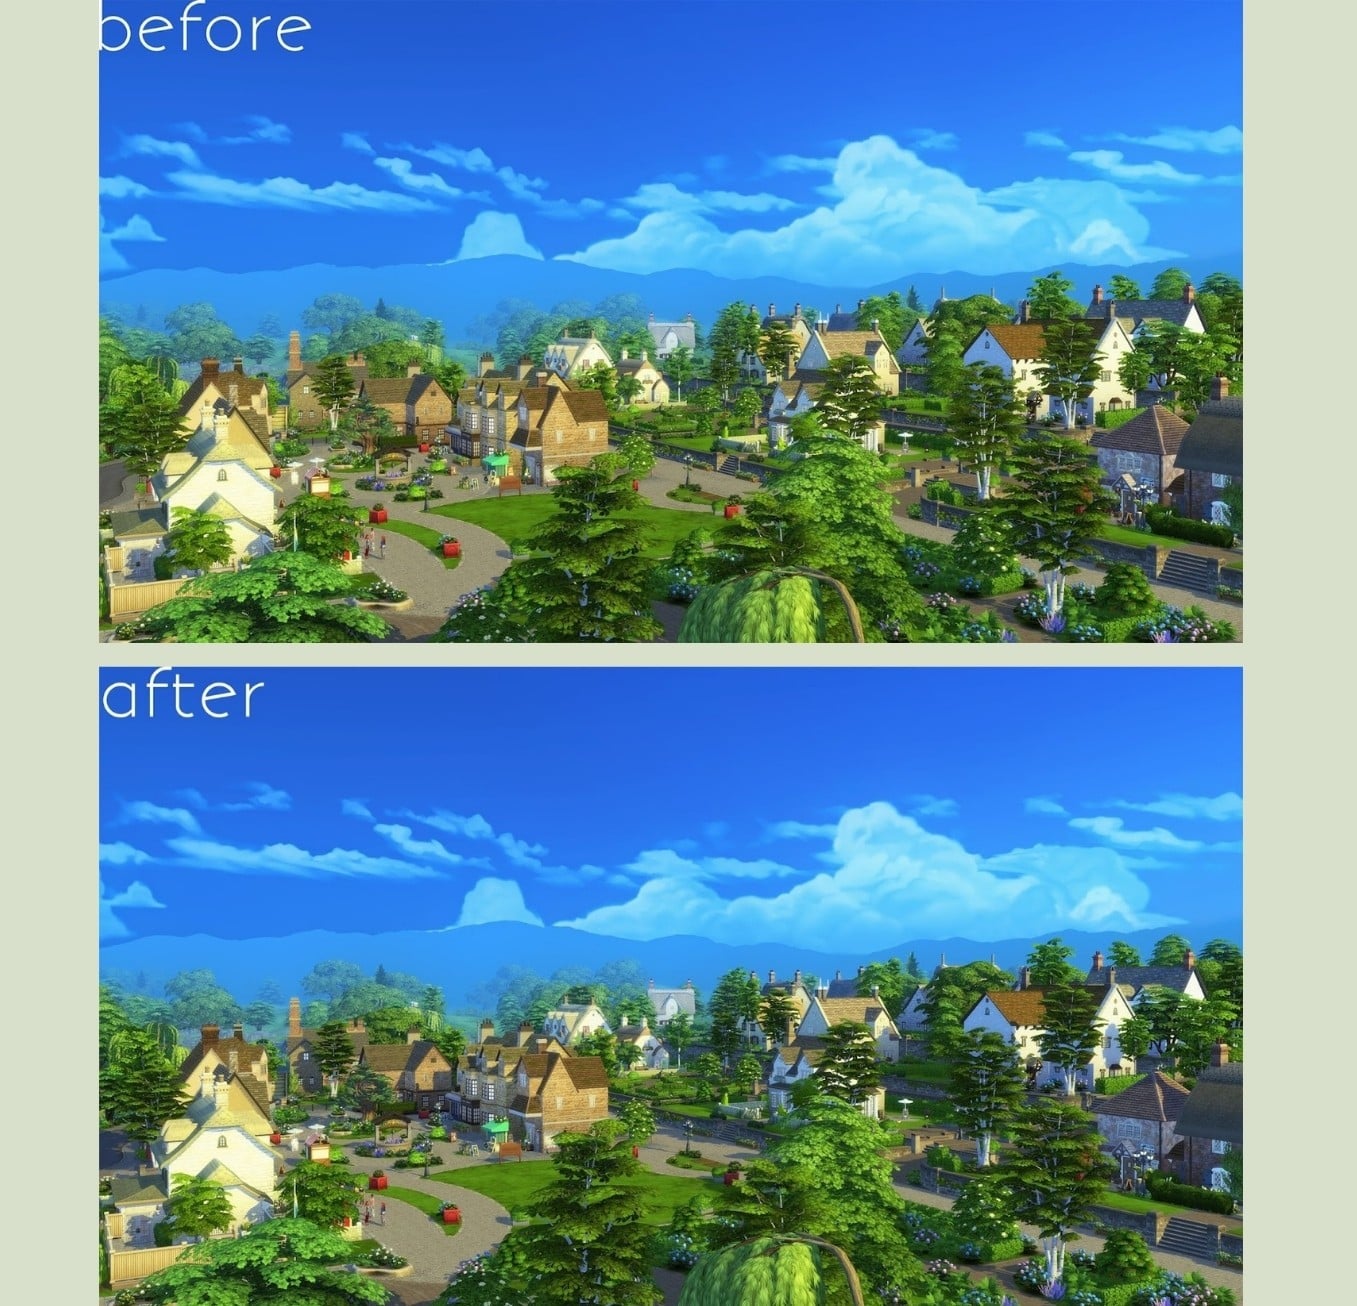
To further improve Sims 4 shadows and lighting, download the "Shadows for Days" mod by Amoebae.
This adds realistic midday shadow effects and enhances overall lighting. It’s suitable even for players who can’t use Simp4Sims’s advanced configs due to low specs.
The archive also contains Sims 4 camera mod settings. You can drop it with replacement into the root folder following this path:
C: — (your platform where you purchase the game) — The Sims 4 — Game — Bin — res
For best results, manually tweak your VideoCamera file as described below:

4. Cinematic Live Mode Camera by Simmattically
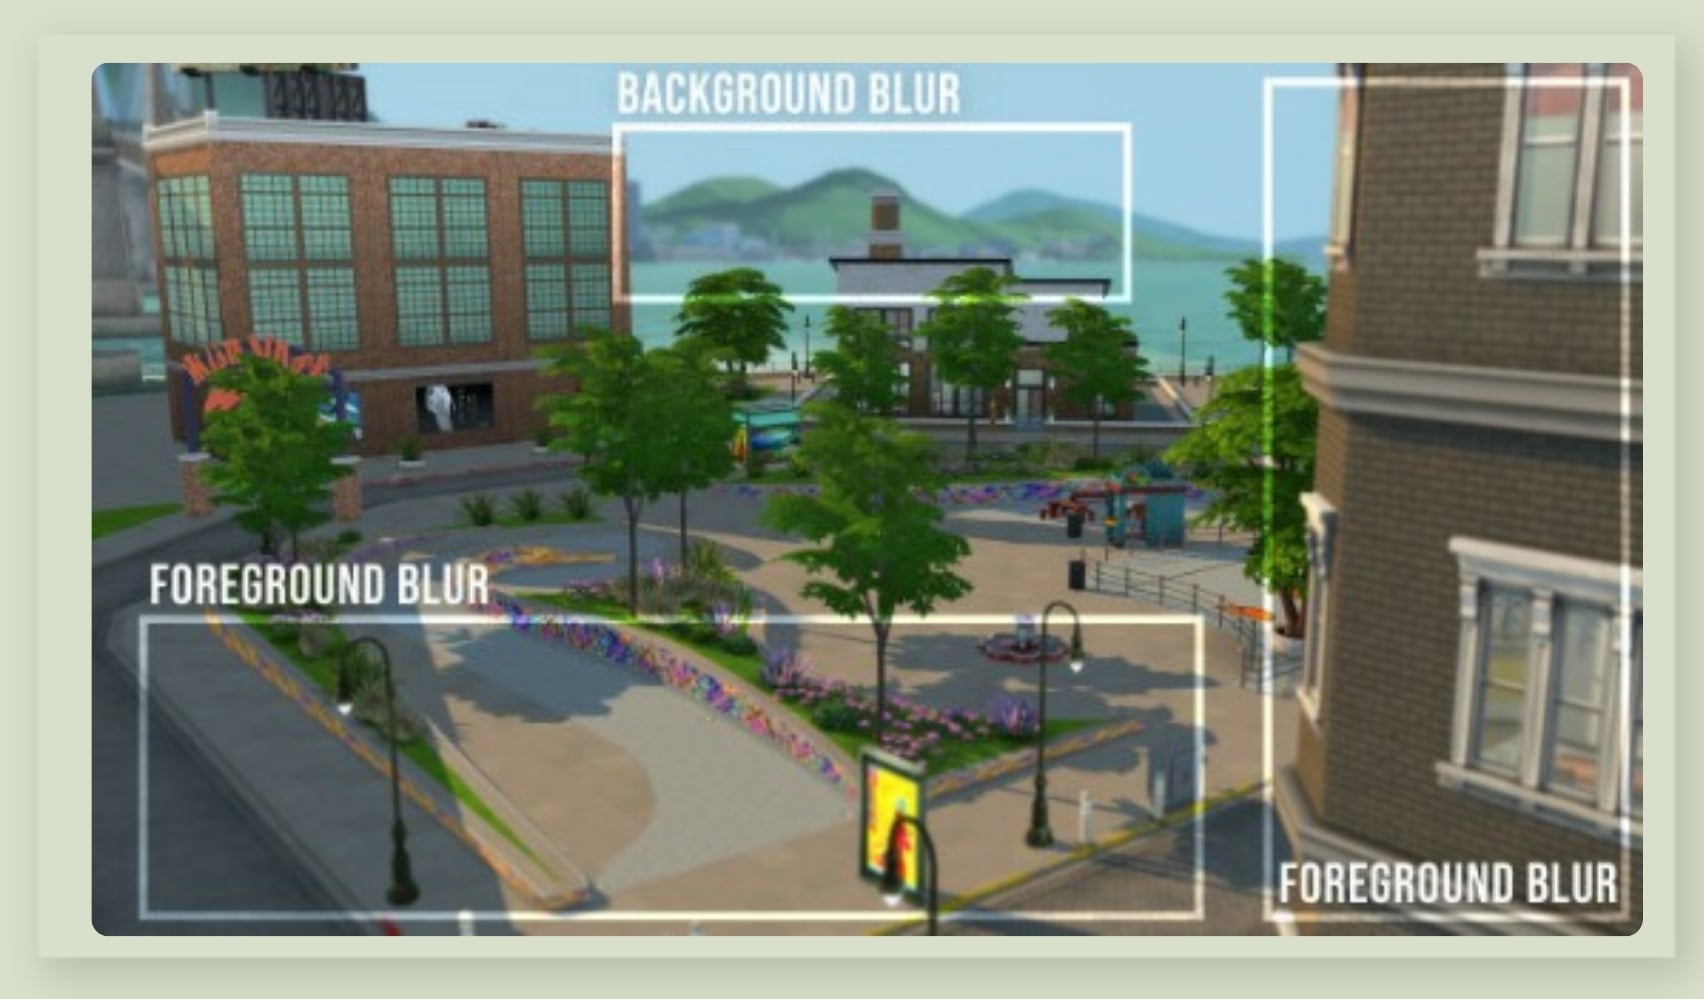
Want a true cinematic look in The Sims 4?
Download the Cinematic Live Mode Camera mod to blur background/foreground and create cinematic screenshots. Place the file in your Mods folder.
Personally, the advanced configurations and Gshade are enough for me, but for MAC users it will come in handy.
5. Extra Sims 4 Graphics Tips & Tweaks
Combine Camera Controls (Sims 3 and Sims 4 Styles)
For more flexible camera movement, locate the Camera file:
C: — (your platform where you purchase the game) — The Sims 4 — Game — Bin — res
And change the settings:
[advanced]
ClickDragEnabled = true
Save for improved camera control.
Cinematic Camera Settings (Smooth Cutscenes)
Find the VideoCamera file and apply these tweaks for slow, cinematic flyovers:
C: — (your platform where you purchase the game) — The Sims 4 — Game — Bin — res
Change the values:
[Default interpolator parameters]
DefaultInterpolatorType = Linear
DefaultInterpolatorTime = 20.0
[Camera 5 interpolator parameters]
InterpolatorType = Linear
InterpolatorTime = 15.0
[Camera 6 interpolator parameters]
InterpolatorType = Linear
InterpolatorTime = 8.0
[Camera 7 interpolator parameters]
InterpolatorType = EasyIn
InterpolatorTime = 16.0
[Camera 8 interpolator parameters]
InterpolatorType = EasyIn
InterpolatorTime = 8.0
[Camera 9 interpolator parameters]
InterpolatorType = EasyOut
InterpolatorTime = 12.0
“EasyIn” means a slow start, and “EasyOut” slows at the end. Higher time values make for longer camera movements.
Remove the Plumbob Icon
For a cleaner UI, remove or customize the iconic Plumbob icon:
Find the Default file:
C: — (your platform where you purchase the game) — The Sims 4 — Game — Bin
And change the values:
[PlumbBob]
playeractivecolor = 0.43, 0.78, 0.12, 0.00 # green
motivestatered = 1.00, 0.00, 0.00, 0.00 # red
motivestateorange = 1.00, 0.50, 0.00, 0.00 # orange
motivestateyellow = 1.00, 1.00, 0.00, 0.00 # yellow
socialgroup = 1.00, 1.00, 1.00, 0.10 # white translucent
club = 1.00, 1.00, 1.00, 0.10 # white
npcclub = 1.00, 1.00, 1.00, 0.10 # white translucent
ensemble = 1.00, 1.00, 1.00, 0.10 # white
ATTENTION!!! After updates you need to restore the settings, meaning repeat all the actions described above!